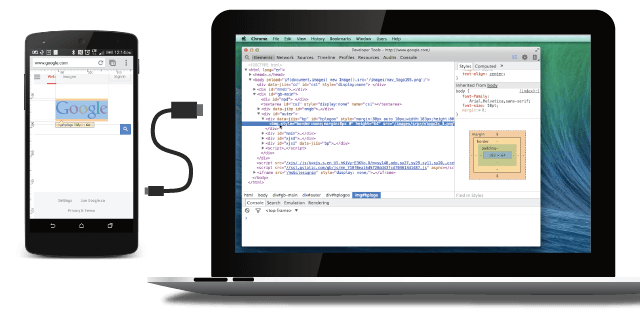
Remote Debugging on Android with Chrome
今天前端同学告诉我说在Chrome能调试Android应用,搜了一下,设备是4.4以上的确实都是可以的,简述一下过程,技术人员应该一看就懂,不细翻译了,喜欢原味的直接走连接
https://developer.chrome.com/devtools/docs/remote-debugging
要求
- Chrome 32 or later installed on your development machine.
- A USB cable to connect your Android device.
- For browser debugging: Android 4.0+ and Chrome for Android.
- For app debugging: Android 4.4+ and a WebView configured for debugging.
步骤
- 打开设备的开发者模式并用数据线连接手机
- 打开
Chrome,地址栏输入chrome://inspect,确保选中,设备连接的时候可能会弹出来授权界面,不用说直接OK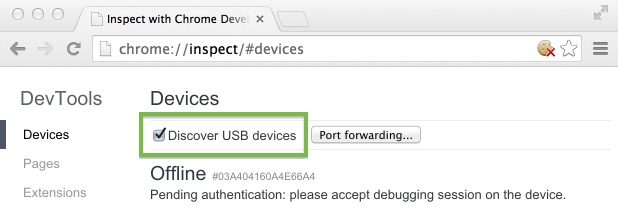
- 这时候
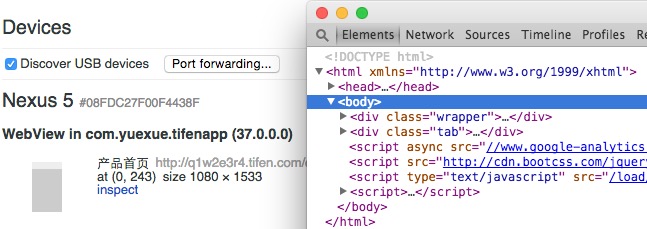
Chrome会展示出来已打开的可调试的设备端的浏览器Tab,点击inspect即可查看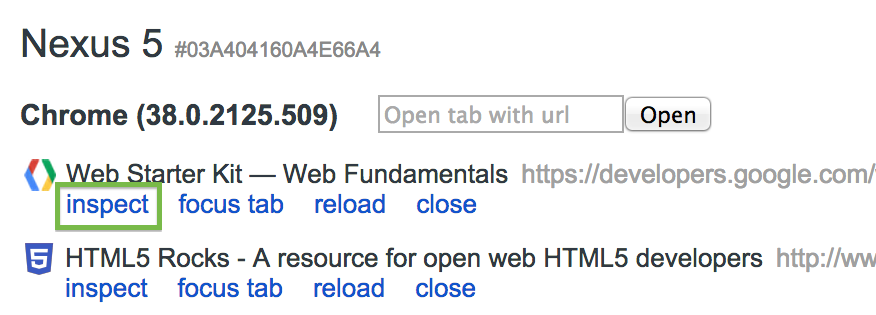
- 如果我们想调试自己的应用的话,需要在代码中增加
WebView.setWebContentsDebuggingEnabled(true);这样就可以了
if (Build.VERSION.SDK_INT >= Build.VERSION_CODES.KITKAT) { WebView.setWebContentsDebuggingEnabled(true); }
Debugging tips
- Use F5 (or Cmd+r on Mac) to reload a remote page from the DevTools window.
- Keep the device on a cellular network. Use the Network panel to view the network waterfall under actual mobile conditions.
- Use the Timeline panel to analyze rendering and CPU usage. Hardware on mobile devices often runs much slower than on your development machine.
- If you’re running a local web server, use port forwarding or virtual host mapping to access the site on your device.
下面的部分不翻译了,直接贴上来吧
Port forwarding
Your phone can’t always reach the content on your development server. They might be on different networks. Moreover, you might be developing on a restricted corporate network.
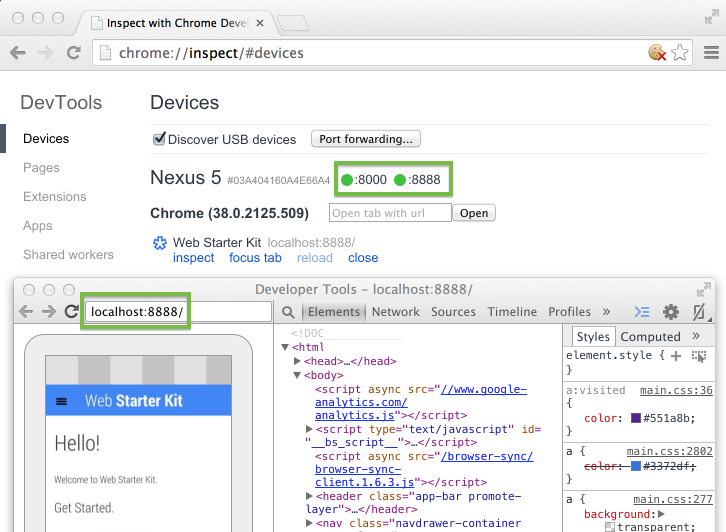
Port forwarding on Chrome for Android makes it easy to test your development site on mobile. It works by creating a listening TCP port on your mobile device that maps to a particular TCP port on your development machine. Traffic between these ports travels through USB, so the connection doesn’t depend on your network configuration.
To enable port forwarding:
- Open chrome://inspect on your development machine.
- Click Port Forwarding. The port forwarding settings display.
- In the Device port field, enter the port number you want your Android device to listen on. (The default port is 8080.)
- In the Host field, enter the IP address (or hostname) and port number where your web application is running. This address can be any local location accessible from your development machine. Currently, port numbers must be between 1024 and 65535 (inclusive).
- Check Enable port forwarding.
- Click Done.
Virtual host mapping
- On the host machine, install proxy software such as Charles Proxy (free trial available) or Squid.
- Run the proxy server and note the port that it’s using.Note: The proxy server and your development server must be running on different ports.
- In a Chrome browser, navigate to chrome://inspect.
- Click Port forwarding. The port forwarding settings display.
- In the Device port field, enter the port number that you want your Android device to listen on. Use a port that Android allows, such as 9000.
- In the Host field, enter localhost:xxxx, where xxxx is the port your proxy is running on.
- Check Enable port forwarding.
- Click Done.
The proxy on the host machine is set up to make requests on behalf of your Android device.
Configure proxy settings on your device
Your Android device needs to communicate with the proxy on the host machine. To configure the proxy settings on your device:
- Select Settings > Wi-Fi.
- Long-press the network that you are currently connected to.Note: Proxy settings apply per network.
- Tap Modify network.
- Select Advanced options.The proxy settings display.
- Tap the Proxy menu and select Manual.
- In the Proxy hostname field, enter localhost.
- In the Proxy port field, enter 9000.
- Tap Save.
Troubleshooting
I can’t see my device on the chrome://inspect page.
- If you are developing on Windows, verify that the appropriate USB driver for your device is installed. See OEM USB Drivers on the Android Developers’ site.
- Verify that the device is connected directly to your machine, bypassing any hubs.
- Verify that USB debugging is enabled on your device. Remember to accept the USB debugging permission alerts on your device.
- On your desktop browser, navigate to chrome://inspect and verify that Discover USB devices is checked.
- Remote debugging requires your version of desktop Chrome to be newer than the version of Chrome for Android on your device. Try using Chrome Canary (Mac/Windows) or the Chrome Dev channel release (Linux) on desktop.
If you still can’t see your device, unplug it. On your device, select Settings > Developer options. Tap Revoke USB debugging authorizations. Then, retry the device setup and discovery processes.
I can’t see my browser tabs on the chrome://inspect page.
- On your device, open the Chrome browser and navigate to the web page you want to debug. Then, refresh the
chrome://inspectpage.
I can’t see my WebViews on the chrome://inspect page.
- Verify that WebView debugging is enabled for your app.
- On your device, open the app with the WebView you want to debug. Then, refresh the
chrome://inspectpage.
I can’t access my web server from my Android device.
- If network restrictions prevent your mobile device from accessing your development server, try enabling port forwarding or setting up a virtual host map.
Lastly, if remote debugging still isn’t working, you can revert to the legacy workflow using the adb binary from the Android SDK.
